Guides · Online selling
How to shoot product photos for clean cutouts (with just a phone)
A simple home setup for product photos that cut out cleanly: backdrop color, window light, camera distance, and special care for glass, jewelry, and shiny items.
By the developer of ImgCutout · Published · 5 min read
An AI background remover can only work with what the camera captured. A sharp, well-lit photo with clear contrast between product and background will cut out cleanly in seconds; a dim, blurry photo on a busy table will need fixing no matter which tool you use. The good news is that you do not need a studio. A phone, a window, and two sheets of card are enough. This guide explains the setup and why each part helps.
What the AI needs from your photo
A background removal model looks at every pixel and decides how likely it is to belong to the main subject. It makes that decision from edges, color, texture, and shape. It does best when:
- The product is sharp. Blur smears the boundary between product and background, so the model has to guess where the edge is.
- There is contrast at the edges. A dark product on a light background, or a light product on a dark one, gives a clear boundary.
- There is one obvious subject. The model is trained to find the main subject. Props, packaging, and other products in the frame compete for that role.
- The product fills a good part of the frame. A small product in a wide shot has fewer pixels along its edge, so fine details such as thin straps get lost.
Every tip below serves one of these four goals.
The backdrop
Use a plain, matte surface that curves up behind the product, so there is no visible horizon line. A large sheet of poster board bent from the table up against a wall works well and is called a sweep.
Choose the color for contrast, not for the final look. The background will be replaced anyway. For dark products use white or light gray; for white or very light products use a mid gray or a muted color, so the white edges of the product do not blend into a white backdrop. Avoid saturated colors such as bright green: they reflect onto the product and tint its edges, which is hard to remove later.
Avoid patterns, wood grain, and fabric with visible texture. Textures near the product's edge are the most common cause of rough cutouts.
The light
Soft, even daylight from a window is the best free light source. Place the table next to a window (not facing it), with the product turned slightly toward the light. On a sunny day, hang a thin white curtain or a sheet of baking paper over the window to soften the light.
Put a sheet of white card on the side of the product opposite the window to bounce light back into the shadows. This simple reflector is the single biggest improvement most people can make.
Turn off overhead room lights, which are usually a different color temperature from daylight and give mixed color casts. Do not use the phone's flash: it creates hard reflections and a dark halo behind the product.
The camera
- Shoot from a little farther away and zoom in slightly, for example at the phone's 2x lens if it has one. This reduces the distortion that makes products look bulging at close range.
- Keep the phone at the product's height for most items, or slightly above for products usually seen from above, such as shoes.
- Tap to focus on the product and lower the exposure slightly if the backdrop is blowing out to pure white around the edges. A slightly underexposed backdrop gives the AI more edge information than a glowing one.
- Use the highest resolution your camera offers. On a computer the cutout keeps the original resolution, and marketplaces reward large images with zoom. Process print-size photos on a laptop or desktop, since phones scale photos above about 4 megapixels down to save memory.
- Fill the frame, leaving a small margin around the product so nothing is cut off. The final framing is applied later by the export preset, so you do not need to compose a perfect square in camera.
- Keep the same position for the whole batch. Mark the product's spot and the tripod or phone position with tape. Consistent originals make a consistent catalog.
Glass, jewelry, and shiny products
These are the hardest products to cut out, for any tool and for human retouchers too.
Clear glass and plastic let the background show through. The model has to decide whether the background visible through the bottle is part of the product or not, and usually treats it as background. To help, shoot clear items on a backdrop that contrasts with their edges: a dark backdrop makes the outline of a glass bottle visible as a bright rim. Expect to check the edges carefully.
Shiny metal and gloss reflect the room. Surround the product with white card on both sides so the reflections are clean white instead of your kitchen.
Jewelry chains and thin wires are only a few pixels wide in a normal photo. Lay chains in a clear shape, shoot as large as possible, and use the edge control (Wider) if parts disappear. For very fine chains, a hand retouch may still be needed.
 Before
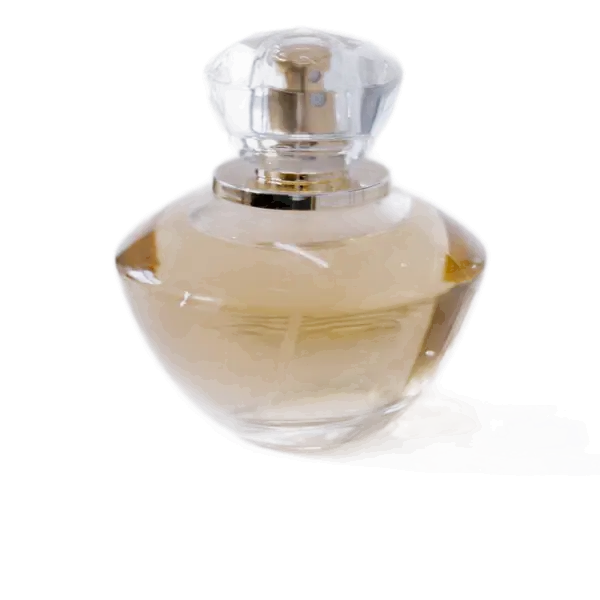 After
AfterA five-minute checklist before you shoot a batch
- Backdrop sweep in place, no visible edges or wrinkles near the product spot.
- Window light from one side, white card reflector on the other, room lights off.
- Phone on a stack of books or a tripod, position marked with tape.
- Focus on the product, exposure adjusted so the backdrop is light but not glowing.
- Test shot run through the bulk background remover before shooting the rest.
That last step is worth the time. If the test cutout has a halo or a missing part, fix the setup now, not after eighty photos.
Summary
Shoot for the cutout, not for the final look: a sharp product, soft side light, a plain matte backdrop that contrasts with the product's edges, and a consistent camera position. With that setup, most products cut out cleanly with no manual fixing, and the export presets take care of the final framing and white background.
Try it on your own photo
Free, no sign-up, and processed on your device. Nothing is uploaded.
Open the bulk background remover